Table of Contents
- Introduction – Why SketchUp?
- What Is SketchUp? – A Complete Overview
- Why Learn SketchUp? – Benefits for Students & Professionals
- Detailed SketchUp Course Syllabus (6 Levels)
- Level 1: Foundations of 3D Modeling
- Level 2: Organizing Complex Models
- Level 3: Materials, Lighting & Scenes
- Level 4: LayOut – Professional Construction Documents
- Level 5: Photorealistic Rendering with V‑Ray/Enscape
- Level 6: Advanced Topics & Extensions
- Tools & Features You Will Master
- Step‑by‑Step Learning Path (Week by Week)
- Real‑World Projects You Will Complete
- Career Opportunities After a SketchUp Course
- Certifications – SketchUp Certified User & Pro
- SketchUp vs Other 3D Software (Blender, AutoCAD, Fusion 360)
- SketchUp Course Costs & Duration at TrendSetter Institute
- Free & Paid Resources to Supplement Your Learning
- Frequently Asked Questions (50+ Expert Answers)
- Student Success Stories (Case Studies)
- Conclusion – Your Future in 3D Design
- Call‑to‑Action – Enroll at Trendsetter Institute Today
1. SketchUp course
Why SketchUp?
At Trendsetter Institute of Computer and Digital Skill, Talagang, we have seen hundreds of students transform their creative ideas into stunning 3D models through our specialized SketchUp course. Whether you dream of becoming an interior designer, a woodworker, a landscape architect, or a 3D visualizer, this SketchUp course provides the most accessible and powerful tools to start your professional journey.
Unlike other complex 3D software that takes months to learn, our SketchUp course is designed for humans, not just engineers. Its intuitive Push/Pull technology allows you to draw a flat shape and instantly turn it into a 3D object. Within hours of starting the SketchUp course, you can create a simple house, and within weeks, you’ll be able to produce photorealistic renders that impress clients. (Read for more about institute)
Explore this complete roadmap to mastering SketchUp through our comprehensive SketchUp course at TrendSetter Institute. You will learn:
- The complete syllabus: A structured journey through 6 levels of our SketchUp course, from beginner basics to advanced techniques.
- Professional Mastery: Every tool and feature you will use in a professional environment.
- Hands-on Learning: Real-world projects you will build throughout the SketchUp course.
- Professional Growth: Career paths, certifications, and earning potential.
- Software Comparison: Insights into why this SketchUp course is the right choice compared to other 3D software.
- Comprehensive FAQ: Answers to 50+ common questions.
By the end, you will be ready to enroll and transform your career.
2. What Is SketchUp?
SketchUp is a premier 3D modeling software developed by Trimble Inc. (originally created by @Last Software and later owned by Google). Since its first release in 2000, it has become one of the most popular tools in the world.
The core focus of our SketchUp course especially for architecture, interior design, woodworking, and landscape architecture. Through this SketchUp course, students learn to master a platform that has set the industry standard for over two decades.
SketchUp is a 3D modeling software developed by Trimble Inc. (originally created by @Last Software and later owned by Google). It was first released in 2000 and has since become one of the most popular 3D modeling tools in the world, especially for architecture, interior design, woodworking, and landscape architecture.
Key Characteristics
| Feature | Description |
| Push/Pull Technology | Draw a 2D shape, click, and drag to extrude into 3D. Revolutionary simplicity. |
| Inference System | Colored guidelines (red, green, blue, cyan, magenta) help you draw accurately without typing coordinates. |
| 3D Warehouse | Millions of free models (furniture, trees, cars, appliances) downloadable instantly. |
| Components & Groups | Reusable objects; edit one instance and all update automatically. |
| Scenes & Styles | Save camera views, shadow settings, and visual styles (sketchy, watercolor, hidden line). |
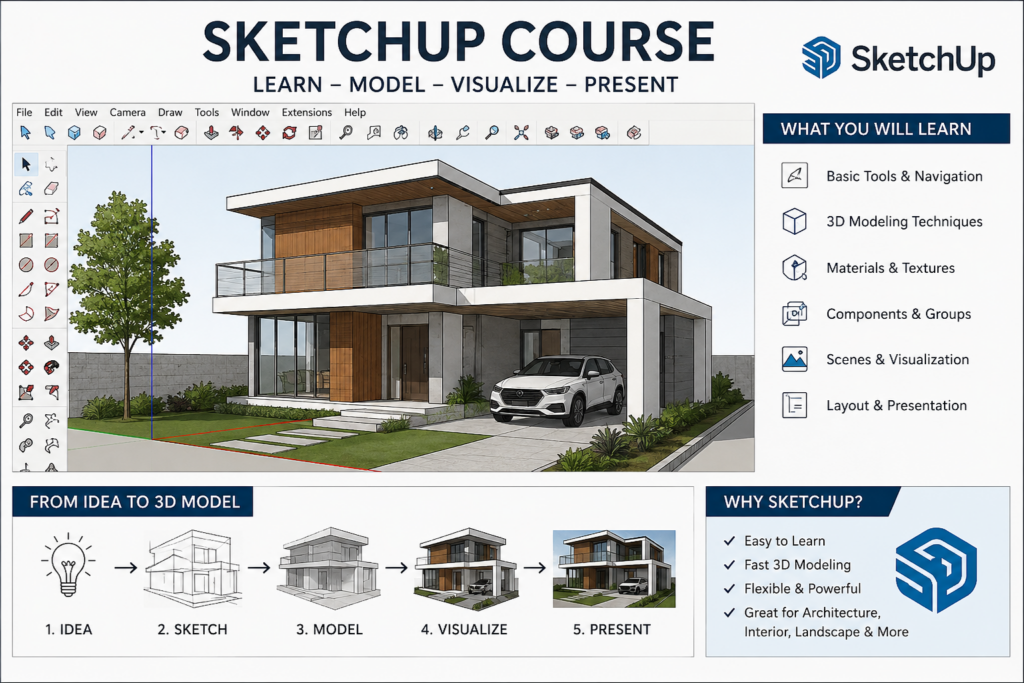
| LayOut (Pro only) | Create scaled construction drawings, presentations, and booklets directly from your 3D model. |
| Extensions | Thousands of plugins for rendering (V‑Ray, Enscape), terrain modeling, export to CNC, and more. |
Who Uses SketchUp?
- Interior Designers – For space planning, furniture layout, material boards, and client walkthroughs.
- Woodworkers – For designing furniture, generating cut lists, and avoiding costly mistakes.
- Landscape Architects – For terrain modeling, planting plans, and solar studies.
- Architects – For early concept modeling and client presentations.
- Real Estate Agents – For virtual staging and simple floor plans.
- Set & Exhibition Designers – For stage layouts, trade show booths, and lighting placement.
- DIY Enthusiasts – For home renovation projects, garden sheds, and hobbyist 3D printing.
SketchUp Versions
| Version | Platform | Cost | Best for |
| SketchUp Free | Web browser | $0 | Hobbyists, beginners, learning |
| SketchUp Go | iPad + basic web | ~$119/year | Mobile users, on‑site presentations |
| SketchUp Pro | Desktop (Win/Mac) + LayOut | ~$349/year | Professionals, small firms, freelancers |
| SketchUp Studio | Pro + rendering + point cloud | ~$749/year | Larger projects requiring high‑end rendering |
At Trendsetter Institute, our SketchUp course focuses on SketchUp Pro because it includes LayOut and full export capabilities (DWG, STL, etc.) essential for professional work.
However, we also ensure our SketchUp course covers the free version, making it accessible for students who may not be able to purchase the Pro version immediately.
3. Why Learn SketchUp?
Benefits for Students & Professionals
3.1 For Beginners
Our SketchUp course is designed to make your entry into 3D modeling as smooth as possible:
- Gentle learning curve: In our SketchUp course, you can model an entire room within your very first hour.
- Immediate feedback: What you see is what you get no hidden command lines or complex coding.
- Forgiving environment: Mistakes are easy to undo, ensuring that your progress in the SketchUp course is never hindered by “fatal errors” that corrupt work.
- Engaging and Fun: We’ve structured the SketchUp course so that learning feels like playing a creative game, not just studying a dry manual.
3.2 For Career Advancement
Enrolling in a SketchUp course opens up significant professional doors and financial growth:
- High demand: Interior design firms, woodworking shops, and real estate agencies actively seek professionals who have completed a formal SketchUp course.
- Freelance opportunities: Platforms like Upwork, Fiverr, and local marketplaces have thousands of jobs specifically for those with SketchUp course certification and skills.
- Higher earnings: A skilled modeler trained through our SketchUp course can earn PKR 50,000–150,000 per month through freelancing.
- Complementary skill: This SketchUp course pairs perfectly with other industry tools like AutoCAD, Revit, and advanced rendering software.
3.3 For Business Owners
Investing in a SketchUp course for yourself or your team provides a massive competitive advantage:
- Visual communication: Clients understand 3D models from our SketchUp course much faster than flat 2D drawings.
- Fewer misunderstandings: Use the skills from the SketchUp course to show exactly what you will build before spending a single rupee on materials.
- Faster revisions: The SketchUp course teaches you how to move walls or change textures in seconds, saving you hours of manual rework.
- Better marketing: Professional renderings and walkthroughs created during the SketchUp course sell projects far more effectively than traditional blueprints.
3.4 For Hobbyists
Even if you aren’t looking for a career, our SketchUp course offers incredible creative freedom for personal projects:
- Design your own furniture: After completing the SketchUp course, you’ll never have to guess if a bookshelf will fit your space again.
- Plan renovations: Visualize your dream kitchen before breaking a single tile by applying the techniques from our SketchUp course.
- 3D printing: We teach you how to export STL files in our SketchUp course so you can literally bring your digital designs to life.
- Share with others: Showcase the skills you gained in the SketchUp course by posting your models on the 3D Warehouse or social media.
4. Detailed SketchUp Course Syllabus (6 Levels)
At Trendsetter Institute, our SketchUp course is divided into 6 progressive levels to ensure a solid learning foundation. Each level of the SketchUp course includes hands‑on exercises, real‑world projects, and quizzes to test your skills.
To validate your expertise, you receive a professional certificate after successfully completing each level of the SketchUp course.
Level 1: Foundations of 3D Modeling (20–25 hours)
Objective: The primary goal of this initial phase of the SketchUp course is to make you completely comfortable with the interface, navigation, and basic modeling tools.
By the end of this module in our SketchUp course, you will be able to model a simple house, a chair, and a garden shed from scratch.
| Module | Topics Covered |
| 1.1 Getting Started | Downloading/accessing SketchUp (Free vs Pro), choosing templates (millimeters, meters, feet/inches), understanding the workspace (menu bar, toolbars, status bar, measurements box, tray) |
| 1.2 Navigation | Orbit (O / middle mouse button), Pan (H), Zoom (Z), Zoom Extents (Shift+Z), Walk (W), Look Around (Shift+O), using the mouse and keyboard together |
| 1.3 Drawing Basics | Line tool (L) – inference colors (red=X, green=Y, blue=Z, on face=cyan, parallel/perpendicular=magenta), Rectangle (R), Circle (C), Polygon, Arc (A) – 3‑point, pie, tangent |
| 1.4 Selection & Manipulation | Select tool (Space), selection methods (single click, double‑click for linked, triple‑click for all connected), Move (M), Copy (Ctrl+Move), Rotate (Q), Scale (S) – uniform vs non‑uniform, using the Measurements box to type exact values |
| 1.5 The Push/Pull Tool | The heart of SketchUp. Select a face, click, drag to extrude. Double‑click to repeat last extrusion. Use Ctrl/Option to leave the original face. Push/pull curved shapes, push/pull groups. |
| 1.6 Groups & Components | Why we need groups (to prevent geometry sticking together), creating a group (G), editing a group (double‑click), exploding groups, creating components (C), difference between groups and components, component browser |
| 1.7 Basic Textures | Applying colors from the default library, using the Paint Bucket (B), editing a material (color, opacity, texture size) |
Is section mein keywords ko projects aur practical learning ke saath is tarah adjust kiya hai ke potential students ko course ki value nazar aaye:
Projects completed in Level 1:
As part of the initial phase of our SketchUp course, you will work on these foundational projects to build your confidence:
- A simple house: Learn the core workflow of our SketchUp course by creating a floor rectangle, using push/pull for walls, and adding a roof with the Follow Me tool.
- A basic chair: Master precision modeling by constructing a seat, four legs, and a backrest from scratch.
- A garden shed: Apply the sloped roof techniques taught in the SketchUp course to create a detailed outdoor structure.
Final Assessment: To complete this stage of the SketchUp course, you must model a studio apartment (5m x 4m) featuring one door, one window, a table, and two chairs.
This task is designed to test the fundamental skills you’ve acquired during the SketchUp course. Please submit your final work as a. skip file along with a high-quality screenshot for evaluation.

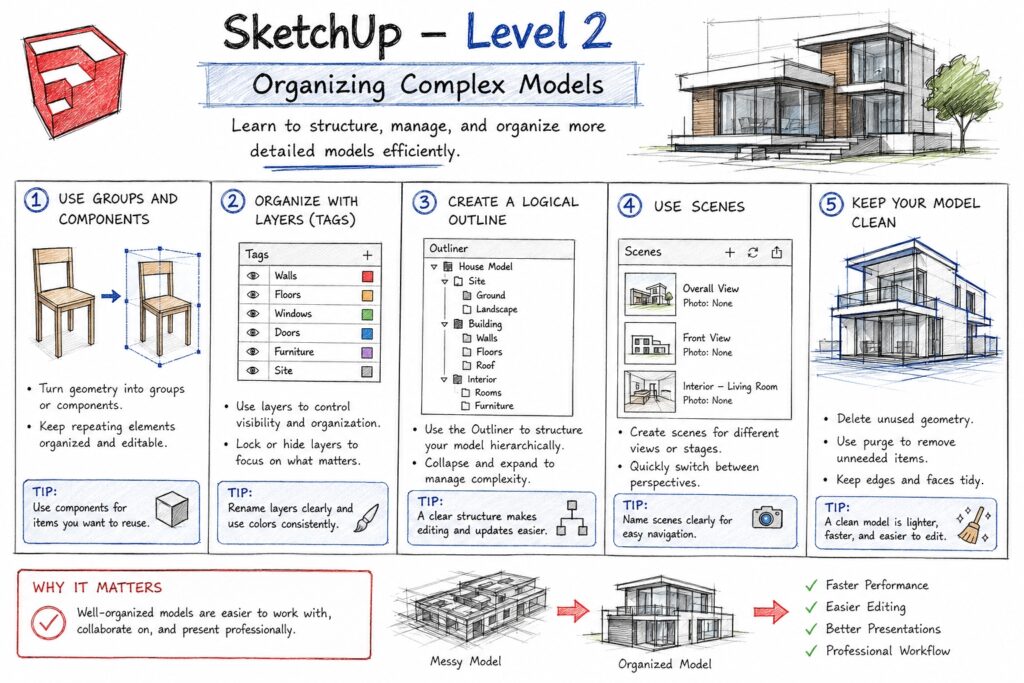
Level 2: Organizing Complex Models (20–25 hours)
Objective: The second stage of our SketchUp course focuses on teaching you how to manage large, complex models efficiently. You will master organizational workflows using components, layers (tags), and the Outliner, while also learning advanced techniques in the SketchUp course such as the Follow Me tool and Solid Tools for precision modeling.
| Module | Topics Covered |
| 2.1 3D Warehouse | Accessing the warehouse (Window → 3D Warehouse), searching for models (furniture, appliances, trees, vehicles), downloading and inserting, adjusting scale after import, replacing components, saving local collections |
| 2.2 Outliner & Layers (Tags) | Outliner (hierarchy of groups/components), renaming objects, searching, selecting from Outliner. Layers (now called “Tags” in newer versions) – creating tags, assigning objects to tags, hiding/showing tags, tag folders, using tags for different phases (existing, new, demo) |
| 2.3 Follow Me Tool | Extruding a face along a path. Examples: pipe, handrail, picture frame, cornice, curved windows. Creating a spiral ramp. Tips for clean geometry. |
| 2.4 Offset & Scale | Offset tool (F) – creating parallel lines/faces, second‑click offset, offset on curved surfaces. Scale tool advanced – scaling along one axis (use Ctrl key for center scaling), scaling groups/components without distorting textures. |
| 2.5 Tape Measure & Guides | Measuring distances (T), creating guide lines and points, using guides for precision layout, resizing the entire model with the Tape Measure (click two points, type new distance, press Enter – scale entire model proportionally). |
| 2.6 Solid Tools (Pro only) | What makes a solid (closed, manifold group), Union (combine solids), Subtract (cut one solid from another), Intersect (keep only overlapping volume), Trim (use one solid to cut another), Split (divide solid into parts). Practical examples: creating a mortise and tenon, cutting a hole in a wall, making a complex boolean shape. |
| 2.7 Sandbox Tools (Terrain Modeling) | Creating terrain from contours (import .dwg contours → select → From Contours), from scratch (grid), smoove (push/pull terrain), stamp (create flat area), add detail, flip edge. Applying a drape to project a flat pattern onto terrain. |
Is paragraph mein bhi keyword ko projects aur advanced techniques ke sath naturally adjust kar diya hai:
Projects completed in Level 2:
In this stage of the SketchUp course, students tackle more complex designs to build professional-grade skills:
- A fully furnished living room: Learn how to integrate 3D Warehouse components effectively into your workflow, a key skill taught in our SketchUp course.
- Terrain modeling: Master site planning by creating a hillside model with a house, including a driveway and retaining walls.
- A custom cabinet: Use the advanced Solid Tools (union/subtract) covered in the SketchUp course to create precise drawer openings and joinery.
Assessment: Model a small cottage (with interior walls, stairs, and a sloped roof). Add furniture from 3D Warehouse. Create terrain around it. Export two scenes: one bird’s‑eye, one interior view.
Level 3: Materials, Lighting & Scenes
Objective: In this advanced phase of the SketchUp course, the focus shifts to visual quality. You will learn how to make your models look stunningly realistic using professional textures, dynamic shadows, and strategic camera views.
By the end of this module in the SketchUp course, you will be fully equipped to prepare high-end models for professional client presentations.
| Module | Topics Covered |
| 3.1 Materials Library | Accessing default materials (brick, wood, metal, glass, stone, roofing, landscape), using the Materials panel, applying to faces or groups, editing material properties (color, texture image, opacity, reflection, bump map) |
| 3.2 Custom Textures | Importing your own images (JPEG, PNG) as textures, scaling and rotating textures (right‑click → Texture → Position), using the “Projected” texture mode for curved surfaces, saving custom materials to a collection |
| 3.3 Shadows & Geo‑Location | Enabling shadows (View → Shadows), adjusting time of day and month (Shadow Settings panel), setting UTC offset, geo‑locating your model (Add Location) to get accurate sun angles for solar studies, saving shadow studies as scenes |
| 3.4 Scenes (Cameras) | Creating a scene (View → Animation → Add Scene or plus icon), scene tab management (rename, reorder, update, delete), controlling which properties are saved (camera location, shadow settings, layer visibility, style, section planes), scene transition time, creating a walkthrough animation |
| 3.5 Styles | Style builder (Window → Styles), preset styles (sketchy edges, watercolor, hidden line, monochrome, shaded with textures), customizing edge settings (color, thickness, extension, endpoints), face styles (shaded, shaded with textures, wireframe, hidden line, monotone), background and sky settings, watermark/logo overlay |
| 3.6 Section Planes | Adding a section plane (Section Plane tool), moving and rotating the plane, creating a section cut, flipping the cut direction, creating multiple section cuts, exporting section slices to LayOut (for floor plans and elevations), creating a section animation (scenes with moving section plane) |
| 3.7 Exporting Images & Videos | Exporting 2D images (File → Export → 2D Graphic) – PNG, JPEG, TIFF, PDF. Setting resolution (pixels), transparency on/off, anti‑aliasing. Exporting animation (scenes) as MP4 or series of images. |
Projects completed in Level 3:
Level 3 of our SketchUp course focuses on high-end presentation skills and visual storytelling through these projects:
- A photorealistic interior scene: Apply the advanced material and lighting techniques from the SketchUp course to create a living room featuring wood flooring, glass windows, fabric sofas, and metal lamps.
- A solar study animation: Use the shadow settings taught in the SketchUp course to produce a professional animation showing shadows moving across a building from 8 AM to 6 PM.
- A professional presentation board: Compile three distinct scenes (plan view, elevation, and perspective) and learn the correct export settings in the SketchUp course to generate high‑resolution PNGs for clients.
Assessment: Model a small retail shop (30 sq.m.). Apply appropriate materials (tiles flooring, painted walls, glass storefront). Create 5 scenes (entrance, counter, seating, bird’s‑eye, exterior). Export a 10‑second video walkthrough.
Level 4: Layout – Professional Construction Documents
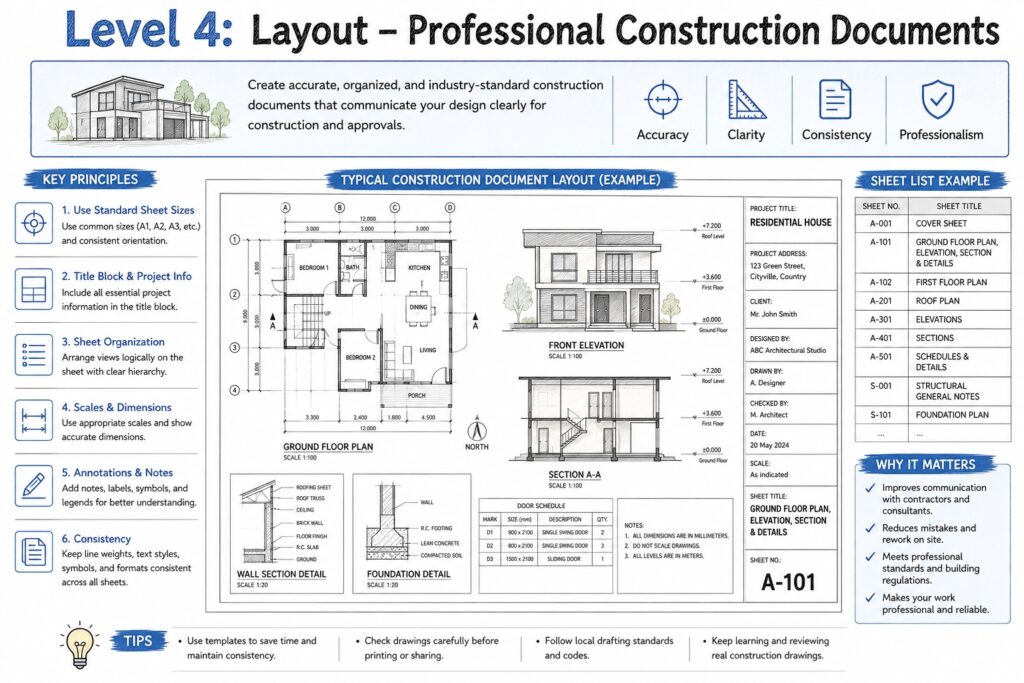
Objective: The goal of this advanced level in our SketchUp course is to teach you how to turn your 3D models into professional construction drawings, client booklets, and scaled plans.
Because this stage focuses on industry-standard documentation, this part of the SketchUp course is taught exclusively using SketchUp Pro, as the essential Layout feature is not available in the free version.
| Module | Topics Covered |
| 4.1 Introduction to LayOut | What is LayOut? (2D documentation and presentation tool), interface (toolbars, pages, layers, tray), document setup (paper size – A3, A4, Letter, Tabloid; units; page orientation) |
| 4.2 Inserting SketchUp Models | Inserting a SketchUp file, viewport fundamentals (a window into your 3D model), choosing orthographic vs perspective, selecting a scale (e.g., 1:50, 1:100, 1/4” = 1’), custom scales, rendering styles (raster, vector, hybrid), updating viewports when model changes |
| 4.3 Dimensions & Labels | Dimension tool (linear, aligned, angular, radius, diameter), dimension styles (arrowheads, text size, units precision), callouts (labels with leader lines), text boxes (rich text), labeling materials or components |
| 4.4 Sheets & Title Blocks | Creating multiple pages, adding a title block (using lines, rectangles, text), inserting fields (automatically updating: date, page number, file name, scale), saving as template, importing logos |
| 4.5 Layer Management in LayOut | Using layers to separate different information (dimensions, notes, title block, viewports), layer visibility, layer order for printing |
| 4.6 Exporting & Printing | Export to PDF (single page or multi‑page, vector quality = crisp lines), export to DWG/DXF (for AutoCAD users), printing to scale (printer settings), publishing to Trimble Connect |
Projects completed in Level 4:
Level 4 of the SketchUp course bridge the gap between 3D modeling and real-world execution through these detailed projects:
- Full construction drawings: Using the advanced documentation tools covered in the SketchUp course, you will create a complete set for a garden shed, including site plans, floor plans, four elevations, and roof plans.
- A client presentation booklet: Master the art of professional delivery in our SketchUp course by compiling a 12-page booklet featuring 3D renders, dimensioned layouts, material boards, and cost estimate tables.
Is assessment section mein keyword ko humne official criteria aur professional submission ke taur par set kar diya hai:
Final Assessment: To qualify for the Level 4 certificate in our SketchUp course, you will use a provided base model of a small house to produce a professional documentation set. This task evaluates your ability to translate 3D work into technical drawings, a core competency of our SketchUp course. You must prepare:
- Title block: Professional layout featuring your name and date.
- Scaled Floor plan: Detailed plan at 1:50 scale with accurate dimensions.
- Front elevation: Scaled at 1:50 to show exterior details.
- Section cut: A technical 1:50 cross-section of the structure.
- 3D Perspective: A clean view rendered in vector style.
- Final Export: All pages compiled into a single multi-page PDF as taught in the SketchUp course.
Level 5: Photorealistic Rendering with V‑Ray / Enscape (20–25 hours)
Objective: Create stunning, photorealistic images and animations that look like photographs. We teach V‑Ray for SketchUp (industry standard) and Enscape (real‑time).
| Module | Topics Covered (V‑Ray focus) |
| 5.1 Installing V‑Ray | V‑Ray trial vs licensed, asset editor interface, render button, progressive vs bucket rendering |
| 5.2 V‑Ray Materials | Material library (preset metals, plastics, glass, wood, fabric), creating custom materials: diffuse (color/texture), reflection (glossiness, fresnel IOR), refraction (transparency), bump/normal maps, displacement (for stones, bricks) |
| 5.3 Lighting | Rectangle light (window light, soft box), sphere light (bulb), IES lights (real photometric profiles), dome light (HDRI environment), Sun & Sky (based on SketchUp sun position), emissive materials (TV screen, light panel) |
| 5.4 Cameras | Physical camera (exposure, shutter speed, ISO, f‑stop, white balance), depth of field (blur background), auto vs manual focus, camera exposure compensation |
| 5.5 Rendering Settings | Quality presets (low, medium, high, very high), resolution (HD, 4K), render elements (beauty, reflection, alpha, shadow, Z‑depth), denoiser (reduces noise), render time optimisation (using render mask) |
| 5.6 Animation | Rendering a sequence of scenes, creating a video walkthrough (using scenes + V‑Ray frame buffer), post‑processing with Photoshop (colour correction, adding people/trees) |
Module for Enscape (alternative, faster):
- Real‑time rendering (what you see is what you get).
- Quick material editing.
- Walkthrough mode (client can “walk” through your model).
- Export 360° panoramas and VR experiences.
Projects completed in Level 5:
- A photorealistic kitchen render (night scene with under‑cabinet lights).
- An exterior house render with HDRI sky, landscaping, and realistic shadows.
- A 15‑second flythrough animation (saved as MP4).
Assessment: Model a modern living room (or use provided model). Apply V‑Ray materials (wood floor, glass coffee table, leather sofa, fabric curtains). Light with rectangle lights and HDRI. Render one high‑resolution image (3840×2160) and one 360° panorama for VR.
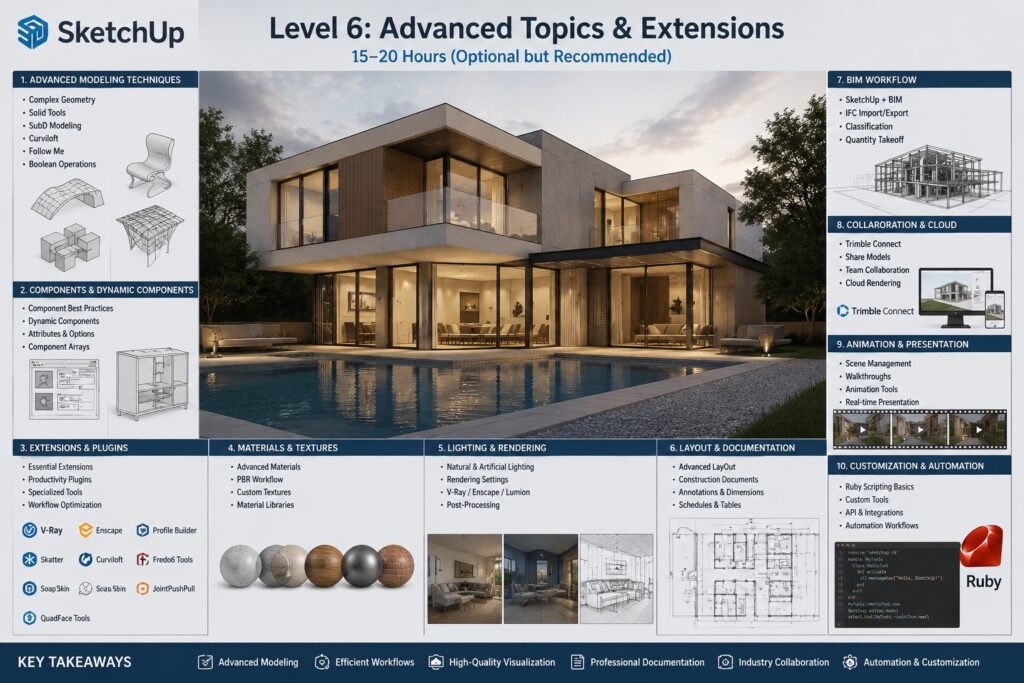
Level 6: Advanced Topics & Extensions (15–20 hours, optional but recommended)
Objective: Go beyond native SketchUp with powerful plugins and advanced workflows.
| Module | Topics Covered |
| 6.1 Extensions Warehouse | Installing extensions, managing extensions, recommended free extensions (CleanUp³, Solid Inspector², Material Tools, Round Corner, Joint Push/Pull) |
| 6.2 Advanced Organic Modeling | Artisan and SubD (subdivision surface modeling) – create smooth, organic shapes (pillows, car bodies, sculptures), converting mesh to subdivision |
| 6.3 Architectural Extensions | Profile Builder (for baseboards, crown moulding, railings), Parametric Modeling (for dynamic components with rules), PlusSpec (BIM‑lite for architecture) |
| 6.4 Woodworking Extensions | CutList Bridge (generates cut lists, material lists, cost estimates), OpenCutList (free alternative), exporting to CNC (ShopBot, VCarve) |
| 6.5 Terrain & Landscape | PlaceMaker (real‑time maps, terrain, buildings), SketchFX (post‑processing effects), Land F/X (planting plans, irrigation) |
| 6.6 Import/Export Advanced | Importing CAD (.dwg) correctly (cleaning geometry, exploding, purging), exporting to STL for 3D printing (checking manifold, fixing flipped faces), exporting to OBJ for Blender/3ds Max, exporting to IFC for BIM (via extensions) |
| 6.7 Collaboration & Cloud | Trimble Connect (cloud storage, model referencing, clash detection), sharing models with clients via web viewer, using SketchUp for iPad with Apple Pencil |
Projects completed in Level 6:
- A smooth, ergonomic chair created with SubD.
- A complete kitchen design with cut list exported to Excel.
- A site model imported from CAD contours, then used in a landscape plan.
Assessment: Choose a real‑world project from your field (interior, woodworking, landscape). Use at least two extensions to complete it. Document your workflow and present the final model.
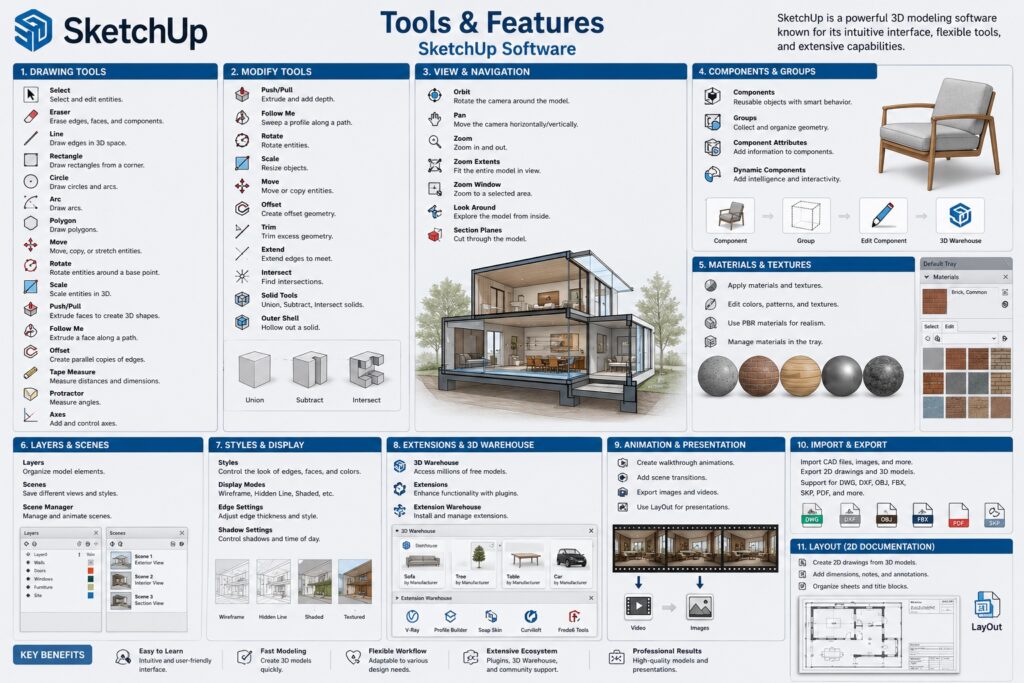
5. Tools & Features You Will Master
By the end of the full course, you will be proficient in every major SketchUp tool and feature:
| Category | Tools / Features |
| Drawing | Line, Rectangle, Circle, Polygon, Arc (3‑point, pie, tangent), Freehand |
| Editing | Push/Pull, Follow Me, Offset, Move, Copy, Rotate, Scale, Flip, Array (via Move + Ctrl) |
| Selection | Select (single, window, crossing), Select by material, Select by layer, Select all connected |
| Organisation | Groups, Components, Outliner, Layers (Tags), Component browser, Dynamic Components |
| Measurement | Tape Measure, Protractor, Dimension (in LayOut), Text labels |
| Visualisation | Materials Editor, Styles, Shadows, Fog, Section Planes, Scenes, Animation |
| Terrain | Sandbox (From Contours, From Scratch, Smoove, Stamp, Drape, Add Detail) |
| Solid Tools | Union, Subtract, Intersect, Trim, Split (Pro only) |
| Documentation | LayOut (Viewports, Scales, Dimensions, Title Blocks, Export to PDF/DWG) |
| Rendering | V‑Ray/Enscape integration (materials, lights, cameras, rendering settings) |
| Extensions | Extension Warehouse, manager, installation, top 10 plugins |
| Import/Export | DWG/DXF, STL, OBJ, IFC, PDF, image formats, Trimble Connect |
6. Step‑by‑Step Learning Path (Week by Week)
Below is a 12‑week (3 month) part‑time schedule for our comprehensive SketchUp course at TrendSetter Institute. It assumes 2 sessions per week (3 hours each) plus 4 hours of practice.
| Week | Level | Topics | Practice Assignment |
| 1 | L1 | Interface, navigation, lines, rectangles, Push/Pull | Model a simple box, a pyramid |
| 2 | L1 | Circles, arcs, Move, Copy, Rotate, Scale | Model a coffee table with turned legs |
| 3 | L1 | Groups, components, Paint Bucket | Model a chair, save as component |
| 4 | L1 | Review + project (small house) | Model a 2‑room house with roof |
| 5 | L2 | 3D Warehouse, Outliner, Layers (Tags) | Download furniture, organize layers |
| 6 | L2 | Follow Me, Offset, Tape Measure | Model a picture frame, a curved handrail |
| 7 | L2 | Solid Tools, Sandbox basics | Create a terrain, place a building |
| 8 | L2 | Review + project (furnished cottage) | Combine terrain, building, furniture |
| 9 | L3 | Materials, custom textures, shadows | Apply wood/glass/stone to cottage |
| 10 | L3 | Scenes, styles, section planes, animation | Create walkthrough animation |
| 11 | L4 | LayOut – viewports, scales, dimensions | Produce plan and elevation from model |
| 12 | L4 | Title blocks, multi‑page PDF, printing | Complete drawing set for cottage |
| Extra (Elective) | L5 & L6 | V‑Ray rendering or extensions | Render exterior image, explore plugins |
Total in‑class hours: ~72 hours
Total practice hours: ~48 hours
Certificate issued: SketchUp Pro – Level 1 to 4 (Basic to Professional Documentation)
Optional add‑ons: V‑Ray Rendering Certificate, Extension Specialist Certificate.
7. Real‑World Projects You Will Complete
Throughout the course, you will complete 7 major projects that you can add to your portfolio.
| Project | Description | Software Used | Portfolio Value |
| 1. Simple House | Floor plan, walls, roof, basic textures | SketchUp basic | Shows fundamental skills |
| 2. Furniture Piece | Detailed chair or table with components and materials | SketchUp + components | For woodworking clients |
| 3. Interior Room | Living room or bedroom with furniture, lighting, shadows | SketchUp + 3D Warehouse | Interior design portfolio |
| 4. Terrain + Building | House on a hillside, driveway, retaining walls | Sandbox tools | Landscape architecture |
| 5. Walkthrough Animation | 30‑second video flythrough using scenes | SketchUp animation | Client presentations |
| 6. Construction Drawing Set | Floor plan, elevations, sections (A3 PDF) | SketchUp + LayOut | Professional documentation |
| 7. Photorealistic Render | High‑res image with V‑Ray or Enscape | V‑Ray/Enscape | Marketing materials |
You will also complete a final capstone project of your choice (interior design, woodworking, landscape, or architecture) that integrates all skills.
8. Career Opportunities After a SketchUp Course
SketchUp proficiency opens doors to many job roles and freelance opportunities.
8.1 Job Roles (with expected salaries in Pakistan, 2026)
| Job Role | Average Monthly Salary (PKR) | Typical Employers |
| Junior Interior Designer | 25,000 – 40,000 | Interior design studios, furniture showrooms |
| 3D Visualizer | 30,000 – 55,000 | Architectural visualisation firms, marketing agencies |
| Woodworking Designer | 25,000 – 45,000 | Furniture workshops, custom carpentry |
| Set & Exhibition Designer | 30,000 – 55,000 | Event management, theatre groups |
| Landscape Designer | 30,000 – 50,000 | Landscape consultancies, real estate developers |
| Real Estate Visualizer | 25,000 – 40,000 | Property developers, real estate agencies |
| Freelance 3D Modeler | 50,000 – 150,000+ (variable) | Upwork, Fiverr, local clients |
| Senior Interior Designer (with experience) | 60,000 – 100,000 | Large design firms |
8.2 Freelance Earnings (Real Examples)
- Single room interior render: PKR 5,000 – 15,000
- Full house 3D model (floors + elevations): PKR 30,000 – 70,000
- Furniture model for 3D printing: PKR 10,000 – 25,000
- Walkthrough animation (30 seconds): PKR 20,000 – 50,000
- Monthly retainer for a design firm: PKR 40,000 – 80,000
8.3 Industries Actively Hiring SketchUp Professionals
- Interior Design & Decoration
- Furniture Manufacturing & Custom Carpentry
- Real Estate Development (virtual staging, floor plans)
- Architecture (conceptual design phase)
- Landscape Architecture
- Set and Exhibition Design
- 3D Printing Services
- DIY & Home Improvement Content Creation (YouTube, blogs)
9. Certifications – SketchUp Certified User & Pro
While our institute certificate validates your training, you can also pursue official Trimble SketchUp certifications to boost your CV.
SketchUp Certified User (Fundamentals)
| Detail | Information |
| Exam code | SKU-001 |
| Format | Online, proctored |
| Duration | 50 minutes |
| Questions | 30 (multiple choice, matching, click‑and‑drag) |
| Passing score | 70% |
| Cost | ~$80 USD |
| Validity | Lifetime |
| Topics | Navigation, drawing, editing, groups/components, materials, scenes, basic export |
SketchUp Pro Certified (Advanced)
| Detail | Information |
| Exam code | SKP-002 |
| Format | Practical, performance‑based |
| Duration | 120 minutes |
| Questions | ~20 (real‑world modeling tasks) |
| Passing score | 75% |
| Cost | ~$150 USD |
| Validity | Lifetime |
| Topics | Solid tools, LayOut, dynamic components, advanced inference, terrain tools, extensions, import/export advanced |
TrendSetter Institute offers exam preparation modules and can guide you through the registration process. Many of our students have successfully passed both levels.
10. SketchUp vs Other 3D Software (Blender, AutoCAD, Fusion 360)
It is important to know how SketchUp compares to alternatives, so you can be confident in your choice.
| Software | Strengths | Weaknesses | Best for |
| SketchUp | Fast, intuitive, excellent for architecture/interiors, huge 3D Warehouse | Low precision, poor organic modeling, no native parametric constraints | Concept design, interior design, woodworking, landscape |
| AutoCAD | Extreme precision, 2D drafting powerhouse, industry standard for construction docs | Steep learning curve, slow for 3D conceptual work | Engineering, construction drawings, large‑scale architecture |
| Blender | Free, incredibly powerful for organic modeling, animation, VFX | Very steep learning curve, not specialized for architecture | 3D animation, game assets, VFX, free open‑source projects |
| Fusion 360 | Parametric, excellent for mechanical product design, CAM integration | Not suitable for architecture/interiors, subscription cost | Mechanical engineering, product design, 3D printing of mechanical parts |
| Revit | BIM (Building Information Modelling), parametric families, documentation | Extremely complex, expensive, overkill for small projects | Large architectural & engineering firms, government projects |
Why choose SketchUp over others for interior design/woodworking?
- You can produce a client‑ready model in hours, not days.
- The 3D Warehouse saves you from modeling every screw and doorknob.
- You can easily iterate based on client feedback (move a wall in seconds).
- The learning curve is gentle – you won’t give up out of frustration.
11. SketchUp Course at Trendsetter Institute
At TrendSetter Institute of Computer and Digital Skill, Talagang, we believe in affordable, high‑quality education. Our prices are among the lowest in the region, without compromising on content or lab access.
What You Get
- Printed course notes (colour, spiral‑bound)
- Exercise files (USB drive or download)
- 24/7 lab access (during institute hours)
- One free retake if you need more practice
- WhatsApp support group (instructor responds within 12 hours)
- Verified certificate (QR code for online verification)
12. Free & Paid Resources to Supplement Your Learning
Even after the course, continue learning with these resources.
Free Resources
| Resource | Type | Link / Access |
| SketchUp Free | Software | app.sketchup.com (web) |
| SketchUp Campus | Official tutorials | learn.sketchup.com |
| SketchUp Essentials (YouTube) | Video lessons (300+ videos) | YouTube |
| The SketchUp Show (podcast) | Audio tips | Spotify / Apple |
| 3D Warehouse | Millions of free models | 3dwarehouse.sketchup.com |
| SketchUp Forums | Community help | forums.sketchup.com |
| Extension Warehouse | Free & paid plugins | extensions.sketchup.com |
Paid Resources (Optional but Valuable)
| Resource | Cost | Best for |
| SketchUp Pro 2025 (official license) | ~$349/year | Professional use (we provide lab, but for home license) |
| Udemy – “SketchUp 2025 – Master from Scratch” | ~$15 (on sale) | Structured self‑paced learning |
| LinkedIn Learning – SketchUp Essential Training | Monthly subscription | Professional video lessons |
| Book: “SketchUp to LayOut” by Matt Donley | ~$30 | Mastering construction documents |
| Book: “SketchUp for Interior Design” by Lydia Cline | ~$40 | Interior‑specific techniques |
13. Frequently Asked Questions
We answer the most common questions students ask before enrolling.
About the Course
Q1. Do I need any prior design experience?
No. The course starts from absolute zero. We assume you only know how to use a mouse and keyboard.
Q2. What computer/laptop do I need?
SketchUp runs on almost any Windows or Mac computer from the last 5 years. Minimum 8GB RAM, integrated graphics is fine. For V‑Ray rendering, a dedicated GPU (NVIDIA GTX 1060 or better) is recommended.
Q3. Do I need to buy SketchUp Pro?
No. We provide lab computers with SketchUp Pro installed. You can also use SketchUp Free at home for practice (most features are similar, except LayOut and .dwg export).
Q4. Is the course online or on‑campus?
Currently we offer on‑campus training at our Talagang center. We believe hands‑on, in‑person instruction is best for mastering 3D modeling. Online options are being planned – contact us for updates.
Q5. What is the class size?
Maximum 12 students per batch. This ensures individual attention.
Q6. What language is used for teaching?
We teach in Urdu/Hindi with English terminology (all commands and menus are in English). Handouts are in English.
Q7. Will I get a certificate?
Yes. You receive a TrendSetter Institute certificate after completing each level. It is not an official Trimble certification, but it is recognised by local employers.
Q8. What if I miss a class?
We provide recorded video of each lecture. You can also attend the same topic in a different batch (subject to seat availability).
Q9. Can I take only Level 1 and then decide about higher levels?
Yes. You can pay level‑by‑level. But the combo packages offer better value.
Q10. Do you offer job placement?
We maintain relationships with interior design firms, real estate agencies, and woodworking shops in Talagang, Chakwal, and Rawalpindi/Islamabad. We share job leads with our graduates. We also help you build a portfolio and LinkedIn profile.
About SketchUp Itself
Q11. Is SketchUp only for professionals?
No. Hobbyists, DIY enthusiasts, and students use it just as much as professionals.
Q12. Can I use SketchUp for 3D printing?
Yes, but only Pro version exports STL. We teach how to make models watertight and manifold for successful prints.
Q13. Is SketchUp good for architectural drawings?
For concept design and client presentations, yes. For final construction documents, you would typically export to AutoCAD or LayOut (which we teach). Many architects use SketchUp + LayOut for small projects.
Q14. Can I do animations in SketchUp?
Yes, using scenes. Create camera views, set scene transitions, export as MP4. For high‑quality animation, we use V‑Ray or Enscape.
Q15. Does SketchUp have a mobile app?
Yes. SketchUp for iPad is excellent and supports Apple Pencil. We cover mobile workflows briefly.
Q16. What is the 3D Warehouse?
It is an online library where millions of users share free 3D models. You can download furniture, trees, vehicles, and even complete buildings. It saves enormous time.
Q17. Can I import AutoCAD files into SketchUp?
Yes (Pro version). We teach how to import .dwg files, clean geometry, and use them as underlays for modeling.
Q18. Does SketchUp have a command line?
No, but you can type measurements in the “Measurements” box in the lower right corner while drawing.
Q19. What is the difference between a group and a component?
Groups are for temporary isolation; components are reusable. If you edit one component, all copies update. We cover this in depth.
Q20. Can I create my own materials?
Yes. Import any image (JPEG, PNG) and use it as a texture. You can also adjust scale, rotation, and opacity.
About Career & Earning Potential
Q21. Can I get a job with only SketchUp skills?
Yes, especially in interior design, woodworking, and real estate visualisation. However, adding AutoCAD or rendering skills makes you more competitive.
Q22. How much do freelancers earn on Upwork/Fiverr?
SketchUp modelling rates range from 10–10–40 per hour. Top Pakistani freelancers earn 1,000–1,000–3,000 per month.
Q23. What is the best industry for SketchUp in Pakistan?
Interior design and real estate virtual staging are currently the most active. Furniture manufacturing (export) also has demand.
Q24. Do I need a degree to work as a SketchUp modeller?
Not necessarily. A strong portfolio and practical skills are often more important. Our certificate helps, but your projects matter most.
Q25. Can I work remotely for international clients?
Absolutely. Many of our graduates work on Upwork, Fiverr, and directly with US/UK/EU design firms.
Technical & Troubleshooting
Q26. Why does my model become slow?
Too many polygons, high‑resolution textures, or too many components. We teach optimisation techniques (purge unused, proxy models, hiding unused layers).
Q27. How do I fix “face is reversed” (blue faces)?
Right‑click → Reverse Faces. Use the “Orient Faces” extension. We cover this.
Q28. Can I recover a corrupted SketchUp file?
Try File → Open → select file → click the gear icon → “Repair”. There are also third‑party recovery tools.
Q29. Does SketchUp support multiple cores?
No – SketchUp is mostly single‑threaded. A faster CPU core speed is more important than many cores.
Q30. Can I use SketchUp on a Chromebook?
Only the web version (SketchUp Free) runs in a browser, but performance may be limited.
General
Q31. How long does it take to become proficient?
With our 12‑week course + daily 1‑hour practice, you will be intermediate (able to complete professional projects). Full proficiency (speed, complex models) takes 6–12 months of regular use.
Q32. Is the course suitable for school students (age 14–18)?
Yes. We have many younger learners. Basic computer literacy is enough.
Q33. Do you teach V‑Ray or Enscape?
Yes, in Level 5 (elective). You can choose either or both.
Q34. What if I want to learn landscape design specifically?
We cover Sandbox tools and terrain modeling in Level 2. We also offer a specialised 2‑week workshop on landscape design upon request.
Q35. Can I use SketchUp for stage or exhibition design?
Yes. Many set designers use SketchUp for quick layout changes and lighting studies.
Q36. Is there a free version of LayOut?
No. LayOut is only available in SketchUp Pro.
Q37. Can I create floor plans in SketchUp?
Yes. You can model walls directly in 3D, or draw a 2D plan on a flat face. Then use LayOut to produce scaled plans.
Q38. Does SketchUp have a dark mode?
Not natively, but you can change window background colour in Preferences → Colors.
Q39. Can I export a SketchUp model to a video game engine?
Yes – export as OBJ or FBX (via plugins) and import into Unity or Unreal Engine.
Q40. What is the difference between SketchUp Free and Pro?
Pro adds: import/export DWG, LayOut, Solid Tools, advanced extensions, STL export, and no watermarks.
Q41. Do you provide a student license for SketchUp Pro?
We provide lab access. For home use, Trimble offers an educational discount for students – we can help you apply.
Q42. Is SketchUp used in the film industry?
Yes, for set design and storyboarding. Many VFX studios use SketchUp for quick previsualisation.
Q43. Can I measure areas and volumes?
Yes – use the Tape Measure tool (length) or select a face and see area in Entity Info. For volumes, select a solid group and check Entity Info (volume).
Q44. Does SketchUp have a library of electrical/plumbing symbols?
Not built‑in, but you can find them in 3D Warehouse or create your own components.
Q45. How do I create a curved roof?
Use Follow Me on a curved path, or create a curved extrusion using the Arc tool and Push/Pull.
Q46. Can I import Google Maps terrain?
Yes – use “Add Location” (geo‑location) to bring in real terrain and satellite imagery.
Q47. Is SketchUp safe for commercial use?
Yes, thousands of businesses use SketchUp Pro daily.
Q48. Can I use SketchUp on two computers?
With a Pro subscription, you can activate on two machines (or use Trimble Connect).
Q49. What is the best way to learn keyboard shortcuts?
We provide a shortcut cheat sheet. Practice by forcing yourself to use shortcuts instead of icons.
Q50. How do I get help if I’m stuck on a model?
Our WhatsApp group is active. You can also post on the SketchUp forum with your .skp file.
14. Student Success Stories (Case Studies)
Case Study 1: Sara – From Homemaker to Interior Designer
Background: Sara, a mother of two from Talagang, had no professional experience but loved decorating her home.
Course: SketchUp Course Master (Levels 1–5).
What she learned: Modeling rooms, using 3D Warehouse, applying materials, rendering with V‑Ray, creating client presentations in Layout.
Outcome: Within 3 months of finishing, she started a home‑based interior design consultancy. She now charges PKR 25,000–40,000 per project. Her renders help clients visualise before buying furniture. She has completed 12 projects in one year.
Case Study 2: Usman – Furniture Craftsman
Background: Usman ran a small carpentry workshop. He used hand sketches that often led to measurement mistakes.
Course: SketchUp Basic + Woodworking extensions (Levels 1–2 plus CutList Bridge).
What he learned: Designing tables, chairs, and cabinets in 3D, generating cut lists, exporting to CNC.
Outcome: His material waste reduced by 30%. He can now show clients a 3D model before building. He has taken on larger projects (e.g., full bedroom sets) and increased his monthly income from PKR 40,000 to PKR 90,000.
Case Study 3: Amir – Real Estate Agent
Background: Amir sold properties but struggled to convey renovation potential to buyers.
Course: SketchUp Intermediate (Levels 1–3) – focused on virtual staging.
What he learned: Modeling empty rooms, placing virtual furniture, changing wall colours, creating before/after scenes.
Outcome: He now creates virtual staging for all his listings. His properties sell 40% faster. He also offers virtual staging as a service to other agents, earning an extra PKR 30,000 per month.
Case Study 4: Fariha – Architecture Student
Background: Fariha is in her 3rd year of architecture school. She struggled to produce concept models quickly.
Course: SketchUp Professional (Levels 1–4) + V‑Ray.
What she learned: Rapid massing, terrain modeling, exporting to LayOut for presentations.
Outcome: Her studio projects now stand out with high‑quality renders and professional drawing sets. She recently won a university design competition and was offered an internship at an architecture firm in Islamabad.
15. Conclusion – Your Future in 3D Design
SketchUp is not just software; it is a creative superpower. Whether you want to design dream homes, craft beautiful furniture, stage properties, or create immersive landscapes, SketchUp gives you the fastest path from idea to visual reality.
At TrendSetter Institute of Computer and Digital Skill, Talagang, we have taught hundreds of students exactly how to harness this power. Our structured, hands‑on course covers everything from the first click to professional rendering and construction documents. We keep class sizes small, instructors are working professionals, and our lab is open for practice every day.
Do not wait for “someday”. The demand for 3D visualisation skills is growing every day in Talagang and beyond. Start your journey now.
16. Enroll at Trendsetter Institute Today
Limited Seats for the 2026 Batch – Register Now!
Become a Certified SketchUp Professional in Just 3 Months.
How to Enroll
- Visit our campus:
TrendSetter Institute of Computer and Digital Skill
Alfalah Bank Street, opt Jinnah park Talagang - Call or WhatsApp:
📞 0301-5408600
📞 0300-5474939 - Social Media:
Facebook: https://www.facebook.com/share/1LF81dRZka/
Instagram: @TrendSetter Institute of computer and digital skill
What You Receive Upon Enrollment
- Complete course kit (printed notes, exercise USB, shortcut card)
- Free lab access (Mon–Sat, 9 AM – 6 PM)
- Lifetime access to recorded video lessons
- One free retake if you need more practice
- WhatsApp support (instructor replies within 12 hours)
- Certificate of completion (verifiable online)
- Job placement assistance (CV review, portfolio guidance, employer introductions)
Free Trial Class
Not sure yet? Attend a free 2‑hour trial class – no commitment. Meet your instructor, see the lab, and try SketchUp yourself. Call us to book a slot.
Your future in 3D design starts here.
TrendSetter Institute of Computer and Digital Skill, Talagang
Empowering Talagang’s Youth with World‑Class Digital Skills
Enroll today and bring your imagination to life!